
In this article we will see that how Dialogflow works and we will try to implement a simple chatbot using Google Cloud Platform.
“Essence of the Assistant app is — Conversation. The more you talk/interact with your assistant , more efficient and perfect it will become. So, you need to spend a lot of time in thinking and writing different routes of the conversation.”
The first step to make a successful assistant app as a developer is to
Stop Thinking Like a Developer.
Yes, you read it right. Stop thinking like a developer and start thinking like end users, start thinking like how different humans will interact with your assistant app, what kind of conversation will take place?
So, leave your coding tools and pick paper and pen and writing down all such conversation routes.
Eg:
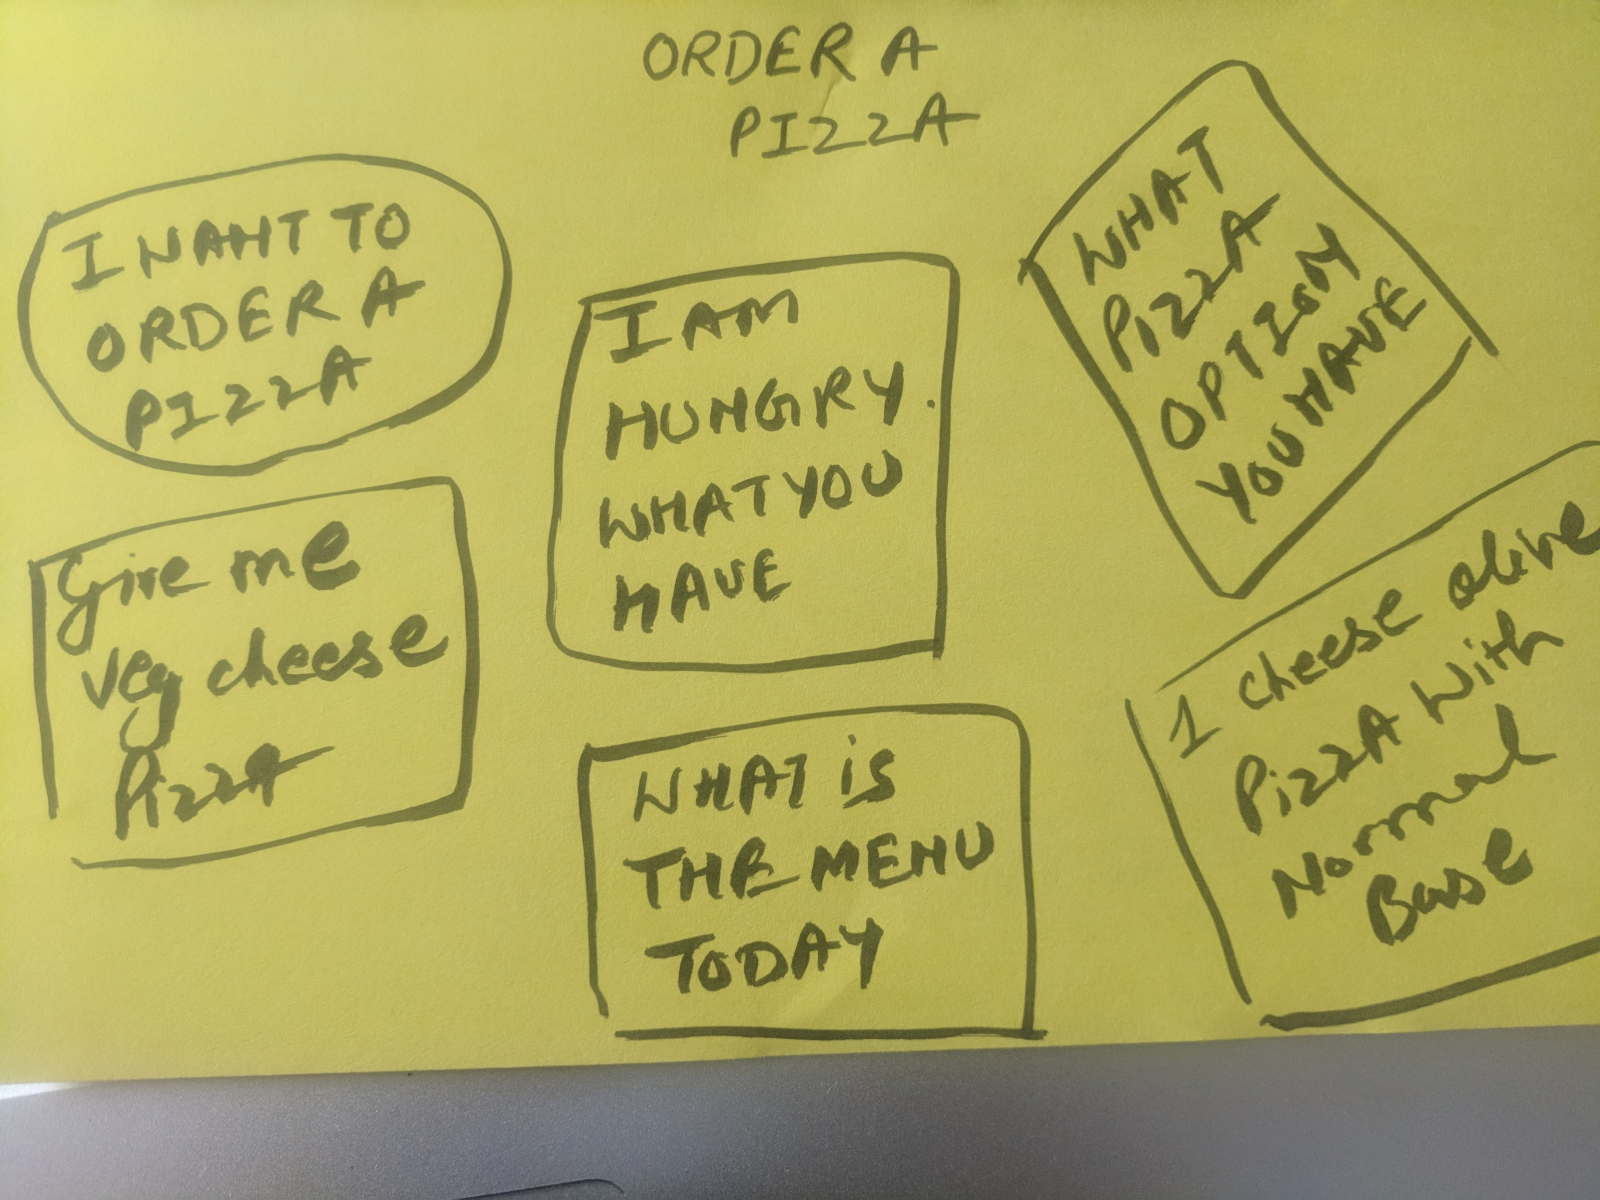
This is an example to show the in so many different ways users can order pizza. The intent will remain same -”Order a pizza” .
1. Chatbot journey
Although chatbots are a current hot topic, they have been around for a while. One of the earliest programs was called ELIZA built in 1966 at the MIT AI lab. It simulated a therapist by usinga script to respond to a user’s questions with simple pattern matching. Most of the bots of the past built on top of decision trees were difficult to maintain. The navigation from one user intent to another used to be difficult to handle and relied on hard-coded responses and logic. This often resulted in a subpar user experience. Over the years, chatbots incorporated newer techniques.
However, building experiences that meet consumers high expectations require sophisticated tools and the right expertise that solve the hardest problems right out of the box. So let’s take a look at some of these challenges. Now, while companies are becoming more and more away of consumers’ high expectations for conversational interfaces, few of them are actually equipped with the right tools and experience to fulfill these expectations for natural language understanding capabilities.
Trying to build out a conversational interface yourself from scratch is complicated. You need to consider supporting multiple languages and dialects, platforms and devices in order to maximize reach. It’s also crucial to incorporate backend enterprise services, such as CRM, which requires a flexible infrastructure architecture. There are a plethora of bots that are solving for irrelevant use cases or that offer really poor experiences. Bots that do one thing well and more helpful that bots that do many things poorly. It is also best if the bot can handle passing on more complicated interactions to a human. Being able to escalate to a human is important, but knowing when to escalate is critical. With sentiment analysis, your chatbot should also be able to gracefully handle routing a conversation to a human operator based on context.
Now that you are more familiar with these challenges, let’s talk about how dialogue flow can address some of them and help you build smart conversational agents that deliver rich experiences.
2 Dialogflow
2.1 How Assistant Works?
The chart below summarizes how an assistant or a simple chatbot/voice bot works :
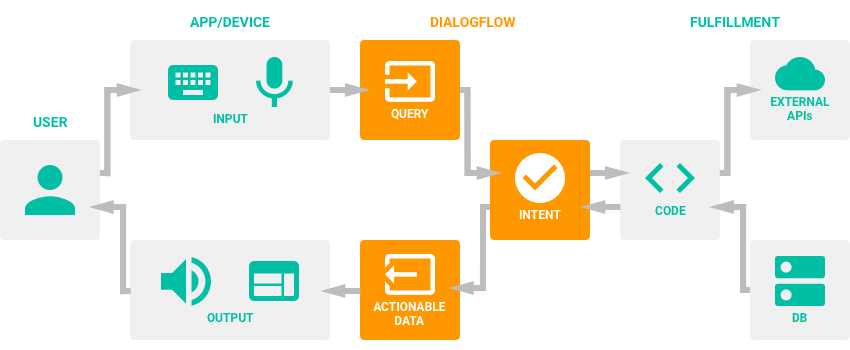
- The user sends a written or oral message on the application / device.
- The application transfers the message to Dialogflow.
- The message is categorized as corresponding to a certain intent (the intentions are set manually by the developers in Dialogflow).
- For each intention arrived at the realization phase, one determines the following actions (Webhook).
- When an intent is detected by Dialogflow, the Webhook uses an API to find the corresponding response in an external database.
- The external database returns the required information to the Webhook.
- The Webhook sends a formatted response corresponding to the intent.
- The intention generates data that can be activated by the different channels on which Chatbot is integrated.
- The actionable data generates an output on the application.
- The user receives an answer in the form of a written message, an image or an oral message.
2.2 What is Dialogflow?

Dialogflow (Previously known as API.AI) is where the magic happens. It works on natural language processing and backed by Machine Learning . At Dialogflow the whole ‘conversation’ take place. Dialogflow is backed by Google and runs on Google infrastructure, which means you can scale to millions of users.
Dialogflow is built on some of the world-class AI assets and capabilities that were originally developed for products like Gmail and Search, with new ones being utilized on an ongoing basis.It incorporates Google’s ever growing AI experience, including machine learning expertise, search capabilities, speech recognition and, of course, natural language understanding.

And Google’s natural language processing capabilities include syntax analysis which allows you to extract tokens and sentences.Identify parts of speech and create dependency parse trees for each sentence.Entity recognition enables your agent to identify identities and label by types such as person, organization, location, events, products, and media. Sentiment analysis gives an understanding of the overall sentiment expressed in a block of text. Content classification allows you to classify documents in over 700 predefined categories.Multi-language support includes the ability to easily analyze text in multiple languages. By leveraging these capabilities and what the developer provides as input training data.
Give users new ways to interact with your product by building engaging voice and text-based conversational interfaces powered by AI. Connect with users on the Google Assistant, Amazon Alexa, Facebook Messenger, and other popular platforms and devices.
The process a Dialogflow agent follows from invocation to fulfillment is similar to someone answering a question, with some liberties taken of course.
2.3 Why Dialogflow?
- On any platform — Dialogflow support more than 20+ platforms from Google home to Twitter
- Across devices — Dialogflow supports all the devices from wearables , to phones to devices.
- Around the world — Dialogflow supports more than 14+ languages worldwide & more support is coming.
- Dialogflow creates unique algorithms for each specific conversational agent under the hood which continuously learns and is tweaked for you as more and more users engage with your agent.
- Using Dialogflow, you can build conversational experiences faster engage end users more efficiently and maximize reach across geographies and platforms.
- Build your agent quickly by starting with just a few training phrases or using one of over 40 pre-built agents.These pre-built agents can be used directly out-of-the-box or imported into your agent to build on and customize for your own use case. These include everything from food delivery,to hotel reservations, to news and reminders.
- You can rely on Dialogflow’s built-in natural language understanding capabilities, model training and analytics that are already taken care of for you.
2.4 Glossary of Dialogflow
1. Agent
Agents are best described as NLU (Natural Language Understanding) modules. These can be included in your app, product, or service and transform natural user requests into actionable data.
Agent is the name of your app you are creating. The name of the agent is very important. Here is few guidelines while picking the name:
You need to invoke your agent by saying:
“Okay Google, talk to
2. Intent
Whenever the user ask a question, it will try to match in corresponding Intent. Intent plays vital role in the assistant app. In Dialogflow, an intent houses elements and logic to parse information from the user and answer their requests.
To understand the question better by intent we (developer) need to feed as much as data we can. The more variations added to the intent, the better the agent will comprehend the user. Developer need to think of different variations of same question.
3. Entity
The Dialogflow agent needs to know what information is useful for answering the user’s request. These pieces of data are called entities. Assume them to be dynamic variables.
4. Fulfilment
Dialogflow backed by Google hence it works on cloud functions. When you need to add some custom code you can do it under the fulfillment tab. Fulfillment is where your custom code goes and bind your intent to cloud functions
5. Context
Context plays vital role in the success of assistant. How? Context helps the assitant to talk more like human by maintaing the context and replying in the context to end users.
6. Platform Integration
Dialogflow is the awesome platform as it not only support the integration to Assistant app it support integration to more than 20+ platform such as twitter, Facebook, Slack etc.
Congrats!! Now you can brag about Assistant and Dialogflow that what it is and how you can start. In next section , we will see real implementation !!
3. Building conversational experiences with Dialogflow
In this section , you’ll learn how to use Dialogflow to create a conversational interface for a pizza ordering use case.
Ojectives
In this lab you will perform the following tasks:
- Build a conversational agent for a fictional pizza shop that will let users place orders
- Define intents for a pizza-ordering use case to match typical user queries
- Identify entities to extract data from user queries
To do so , you need to have a GCP account , so I recommend to start by creating an account at Google Cloud Platform and activate dialogflow as a service You also need to create a project on Google Cloud Platform to start with the development process of creating your own chatbot.
Task 1: Enable APIs
For security purposes, many Google Cloud Services are disabled by default (this is referred to as the principle of least privilege.) You must enable the specific APIs needed by this lab before beginning.
- In the GCP Console, on the Navigation menu (
), click APIs & Services.
- Click Enable APIs and Services.
- Search for Dialogflow, and then select Dialogflow API.
- Click Enable (if not already enabled).
Task 2: Getting started with Dialogflow
Dialogflow requires a Google account to sign in. You will use the qwiklabs account to sign in to complete this lab.
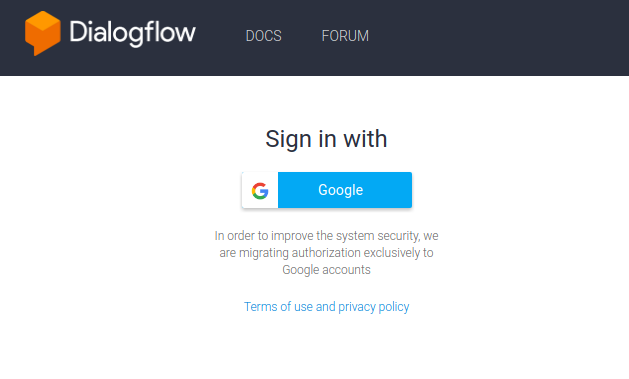
Start with the Dialogflow console at https://console.dialogflow.com
-
Click on Google to sign in.
-
Allow Dialogflow to access your Google account.

-
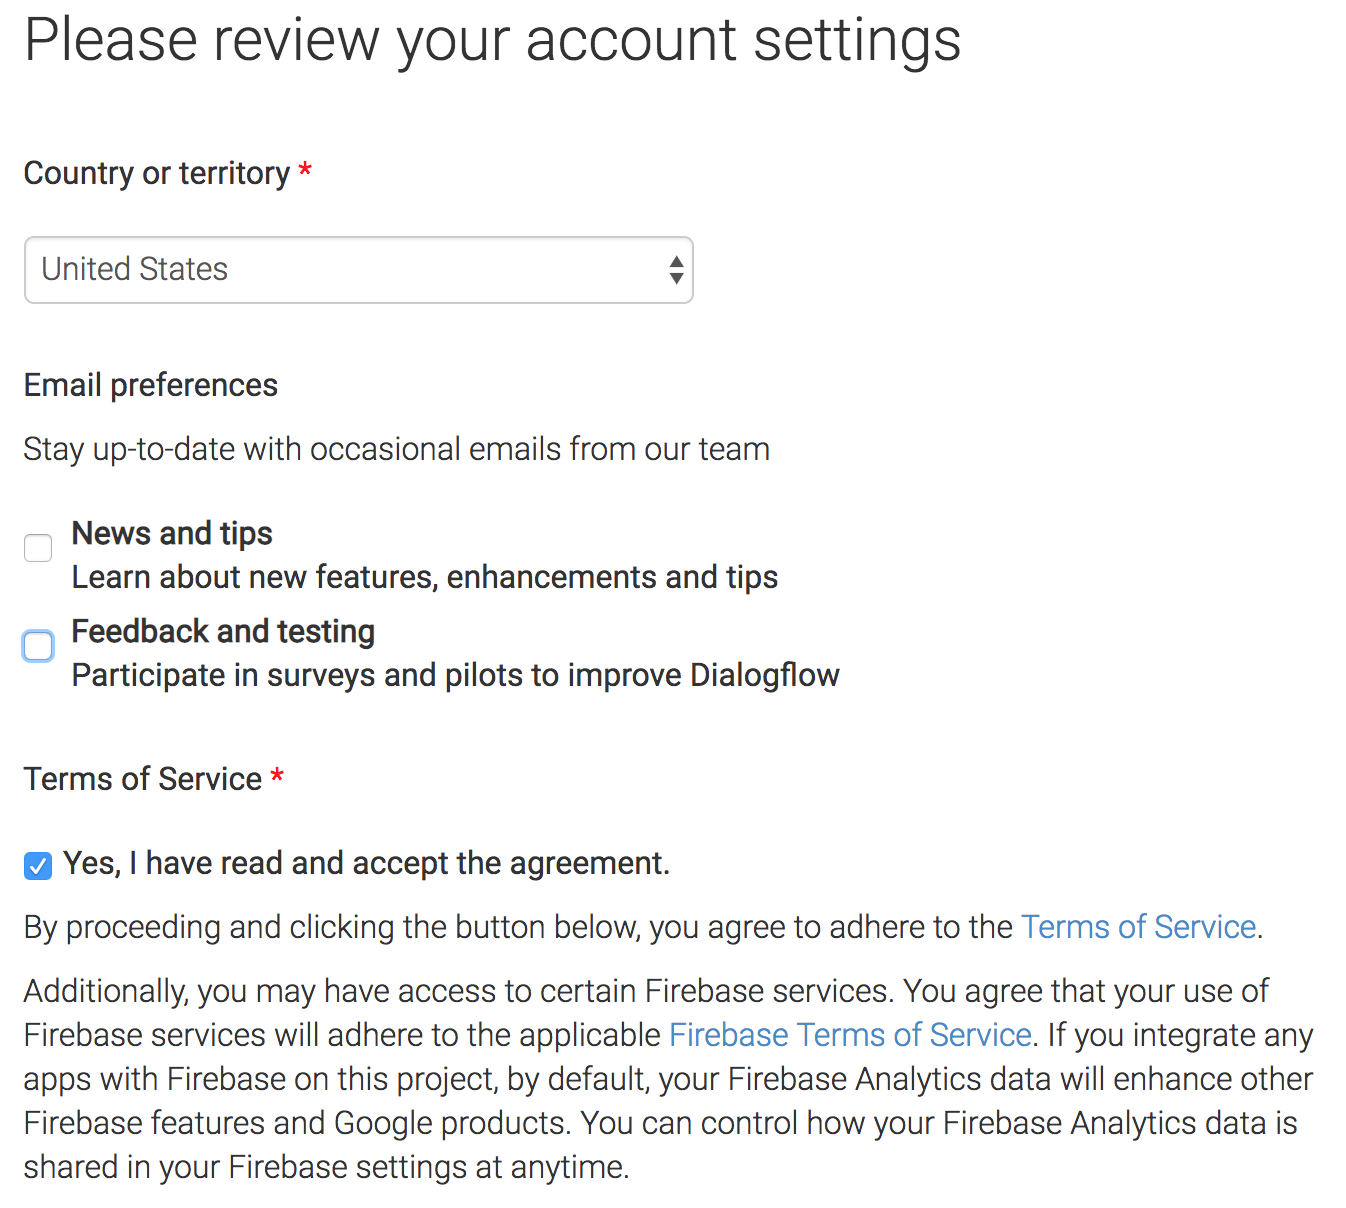
Lastly you’ll be taken to Dialogflow’s terms of service, which you’ll need to accept in order to use Dialogflow.
Task 3: Create your first Dialogflow agent
To create a Dialogflow agent:
- Click Create Agent in the left menu.
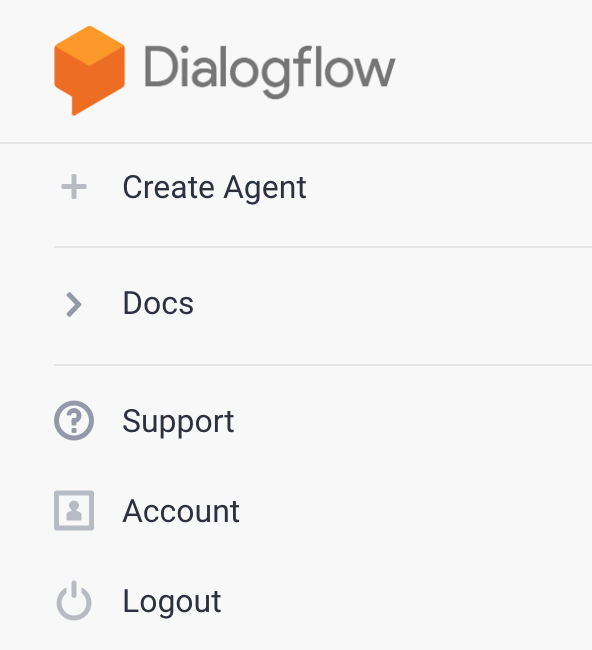
Alternatively, you can also click on the “Create Agent” button on the right of the screen.
- Enter “pizzaBot” for your agent’s name,
Englishas the default language, and set the default time zone to your timezone. Under Google Project, ensure you are using the same project that you see in your GCP console (use the drop-down list to select). Then click the Create button.

The Dialogflow console menu
You should now see the Dialogflow console. On the left is the menu panel. If you’re working on a smaller screen and the menu is hidden, click on the menu ☰ button in the upper left corner. The settings ⚙ button takes you to the current agent’s settings.
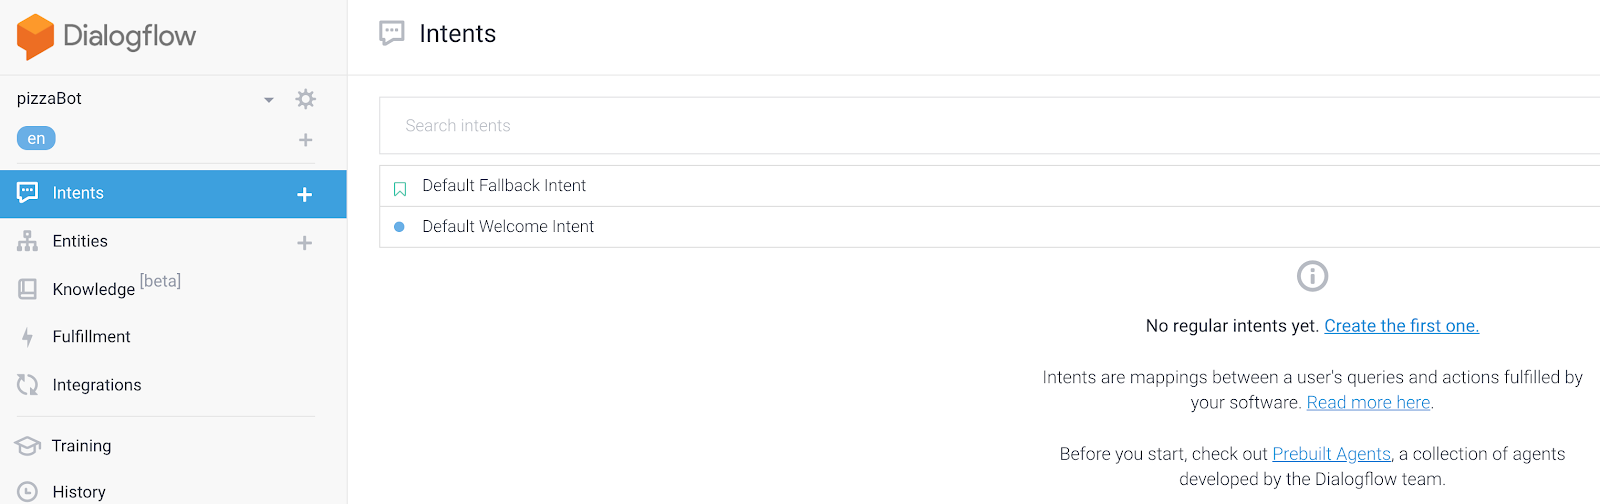
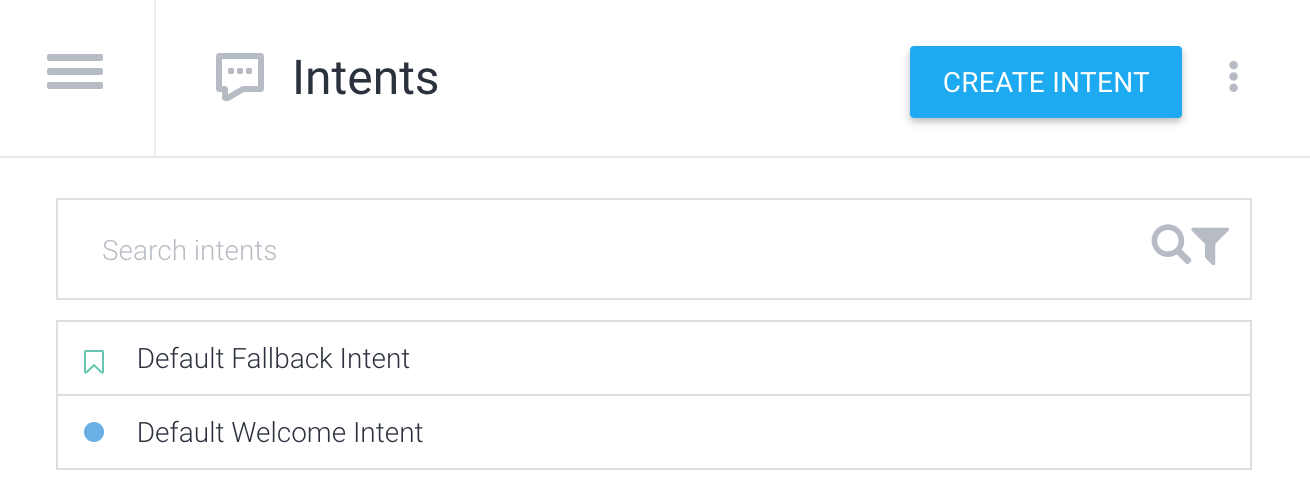
The middle of the page will show the list of intents for the agent. By default, Dialogflow agents start with two intents. Your agent matches Default Fallback Intentwhen it doesn’t understand what your users say. The Default Welcome Intent greets your users. These can be altered to customize the experience.
On the right is the Dialogflow simulator. This lets you try out your agent by speaking or typing messages.

Querying your agent
Agents are best described as NLU (Natural Language Understanding) modules. These can be included in your app, product, or service and transform natural user requests into actionable data.
Time to try out your agent!
- In the simulator on the right, click into the text field that says Try it now, type Hi, and press enter.
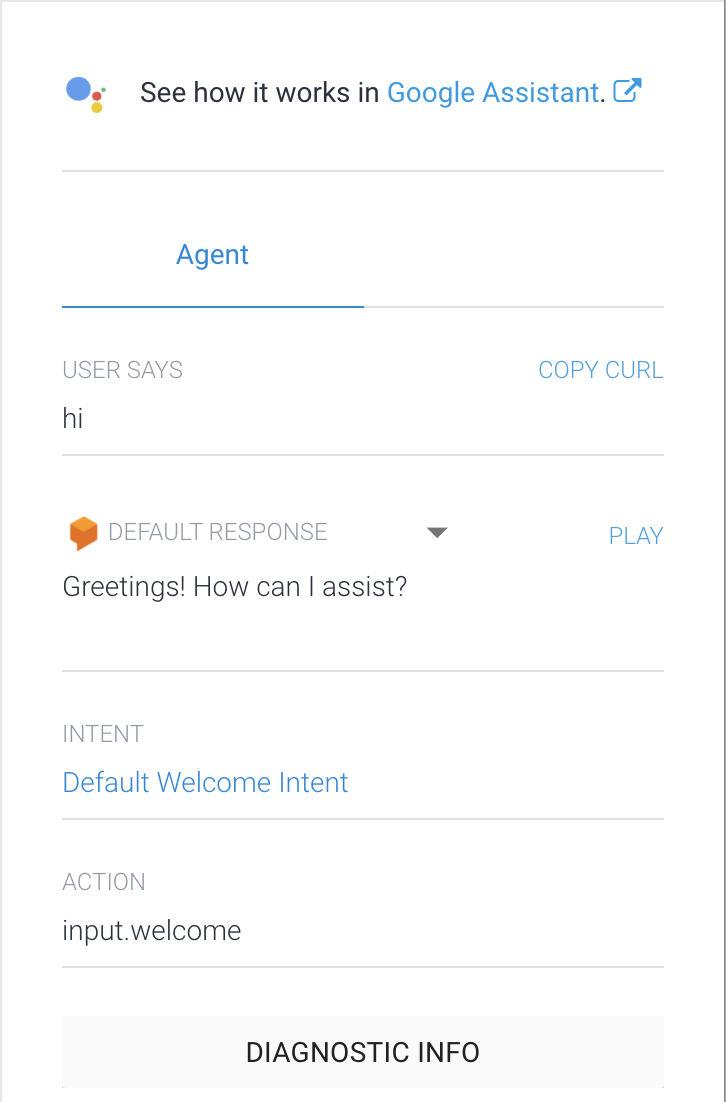
You just spoke to your Dialogflow agent! The Default Welcome Intent is preconfigured to understand basic greetings and to reply with a generic response.
Let’s replace the generic greeting with something that let’s our users know who we are.
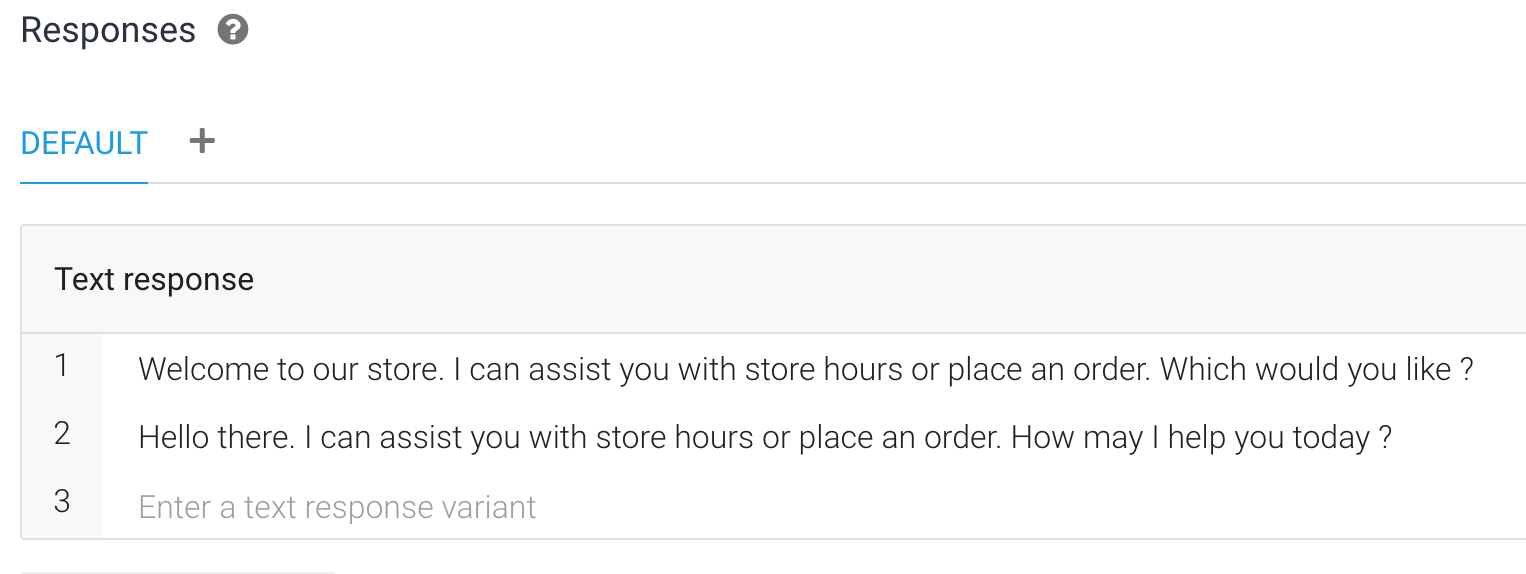
- In the Responses section of the Default Welcome Intent remove all the predefined responses like Good Day! and Greetings! and add the following two responses:
- Welcome to our store. I can assist you with store hours or place an order. Which would you like ?
- Hello there. I can assist you with store hours or place an order. How may I help you today ?
- And then click Save.
Try it out by saying “Hello” to your agent and see how it responds.
In the same way, you may customize the responses for your Default Fallback Intent.
Besides the ones provided by default, we will need custom intents that will answer specific queries for our pizza use case. So let’s create our own intent.
Task 4: Create your first intent
Dialogflow uses intents to categorize a user’s intentions. Intents have Training Phrases, which are examples of what a user might say to your agent. For example, someone wanting to know what hours the pizza shop is open might ask “When do you open?”, “What are your hours?” or “How late can I come in?”. All of these queries are unique but have the same intention: to get information on when the pizza shop is open.
To cover this query, create a “opening.hours” intent:
- Click on the ➕next to Intents in the left menu.
- Add the name opening.hours into the “Intent name” text field.
- In the Training Phrases section, click on Add Training Phrases and enter the following, pressing enter after each entry:
- What time do you open ?
- Are you open right now ?
- Are you open today ?
- When do you close ?

- In the Responses section, under Text Responses, enter the following response in the text field: We are open from 10 am to 9 pm every day. Can I help you place an order ?
- Click the Save button. You may also notice the messages Agent Training started and Agent Training completed on the bottom right of the screen.
- Once training is done, try it out using the simulator on the right by asking the question: Which days are you open ?

Your agent now responds to the query correctly. Notice that even though your query was a little different from the training phrases, Dialogflow still matched the query to the right intent, which in this case, is the opening.hours intent as shown in simulator output.
Dialogflow uses training phrases as examples for a machine learning model to match users’ queries to the correct intent. The machine learning model checks the query against every intent in the agent, gives every intent a score, and the highest-scoring intent is matched. If the highest scoring intent has a very low score, the fallback intent is matched.
Task 5: Extract data with entities
In this section we’ll go over how to extract data from a user’s query to let them place their pizza orders. For example, the agent will not only need to know that a user wants to place an order for a pizza, but it is also important to know the details (or parameters) like size, toppings, and the day and time the user wants to place an order for. For this purpose, you will first create another intent called order.pizza and in the training phrases you provide, identify these important parameters.
Add parameters to your intents
Parameters are important and relevant words or phrases in a user’s query that are extracted, so your agent can provide a proper response.
- Create a new intent by clicking on the plus add next to Intents in the left menu.
- Name the intent order.pizza at the top of the intent page.
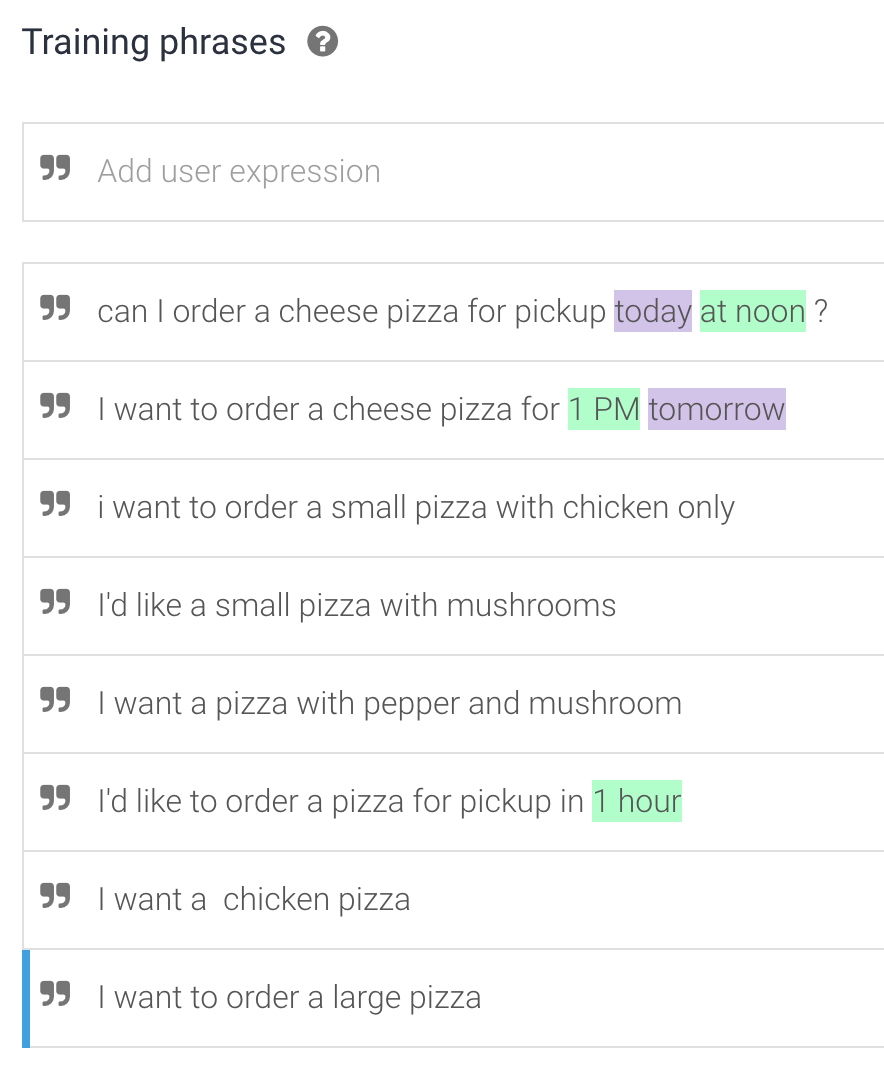
- Add the following as Training Phrases:
- can I order a cheese pizza for pickup today at noon ?
- I want to order a cheese pizza for 1 PM tomorrow
- I want to order a small pizza with chicken only
- I’d like a small pizza with mushrooms
- I want a pizza with pepper and mushroom
- I’d like to order a pizza for pickup in 1 hour
- I want a chicken pizza
- I want to order a large pizza
Dialogflow automatically detects known parameters in your Training Phrases and creates them for you. For example, the first two training phrases have both a date and time.
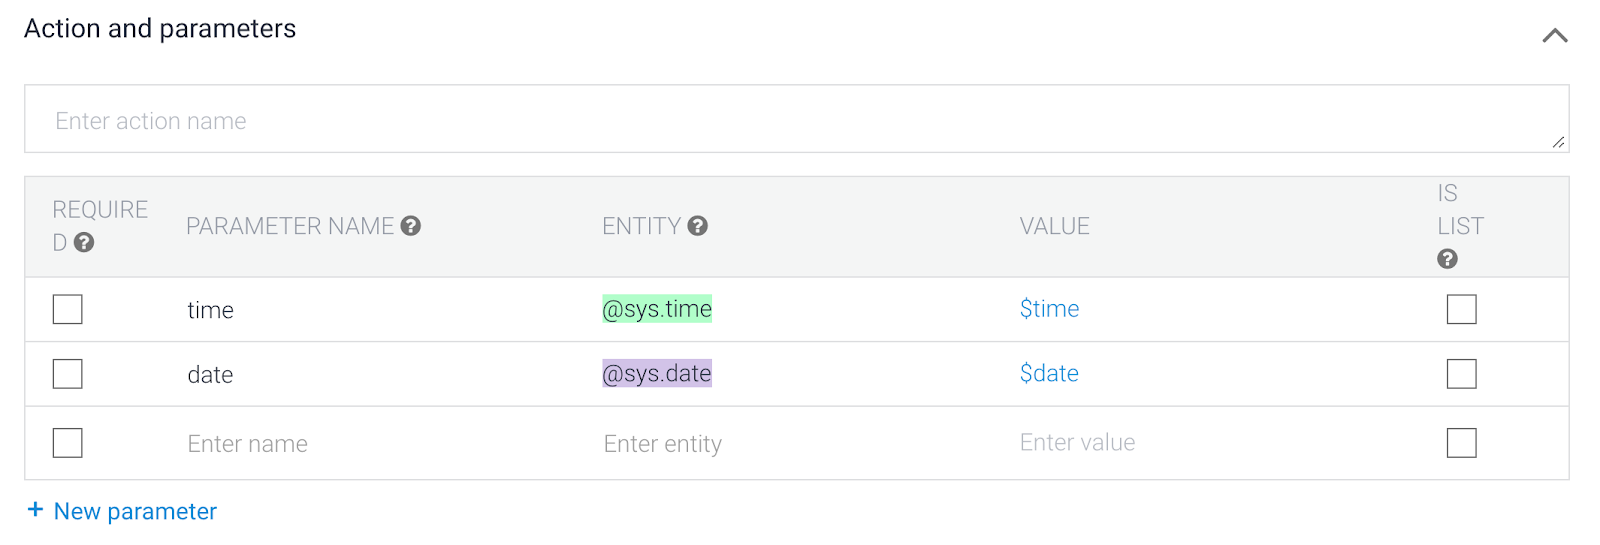
Below the Training Phrases section, the parameter table is automatically filled out with the information Dialogflow gathered:
- The parameter is optional (not required)
- named date and time
- corresponds to the system entity type @sys.date and @sys.time
- has the value of $date and $time
- is not a list
Using parameter data
The value of a parameter can be used in your responses. In this case, you can use $date and $time in your responses and it will be replaced with the date and time specified in the query to your agent.
In the Responses section add the following response and click the Save button:
Try it out
Now, query your agent with “I want to order a cheese pizza for pickup today at 5 pm” in the simulator in the right panel.

In the response, you can see “2018-11-12” and “17:00:00” were correctly inserted where the parameter values were used. This is great but let’s not forget that we still need to extract other parameter values like pizza toppings and size, for which the entities do not yet exist. The next section will add these entities.
Task 6: Create new entities for your use case
- Click on the ➕next to Entities in the left menu.
- Add the name size into the “Entity name” text field.
- Make sure the “Define Synonyms” checkbox is checked
- And enter the following 3 values in the textbox that says “click here to edit entry” (use tab button as you enter the values so they are used as synonyms too, and hit enter to get to the next row)
- small
- medium
- large

- Click the Save button.
- In the same way, create another entity with the name pizza_topping with the following values and synonyms:
| pepper | pepper |
| mushroom | mushroom ,mushrooms |
| bacon | bacon, bacon pieces, bacon bits, bacon slices |
| vegetarian | vegetarian, veggie |
| cheese | cheese |
| jalapeno | jalapeno, hot peppers |
| sausage | sausage |
| onion | onion |
| ham | ham |
| pineapple | pineapple |
- Click the Save button.
Task 7: Map the parameters in your intent to the entities
- Click on Intents in the left menu and then click on the order.pizza intent
- Look at the first training phrase, highlight the word that is either the topping or the size of the pizza being ordered.
- As you highlight the word, for example “cheese”, you will see a dropdown list with system entities and entities you have defined.

- In the case of cheese, it should map to the pizza_topping entity, and if you do not see it in the list, start typing it out in the textbox on top of the dropdown list where it says “filter” and it should fetch the correct entity. Select the @pizza_topping entity.
-
Now you will notice that for this particular training phrase, there are 3 entities identified.

- In the same way, look at the other training phrases, and for each word that describes the size or the topping, highlight it and associate it with either the @size or @pizza_topping entities respectively.
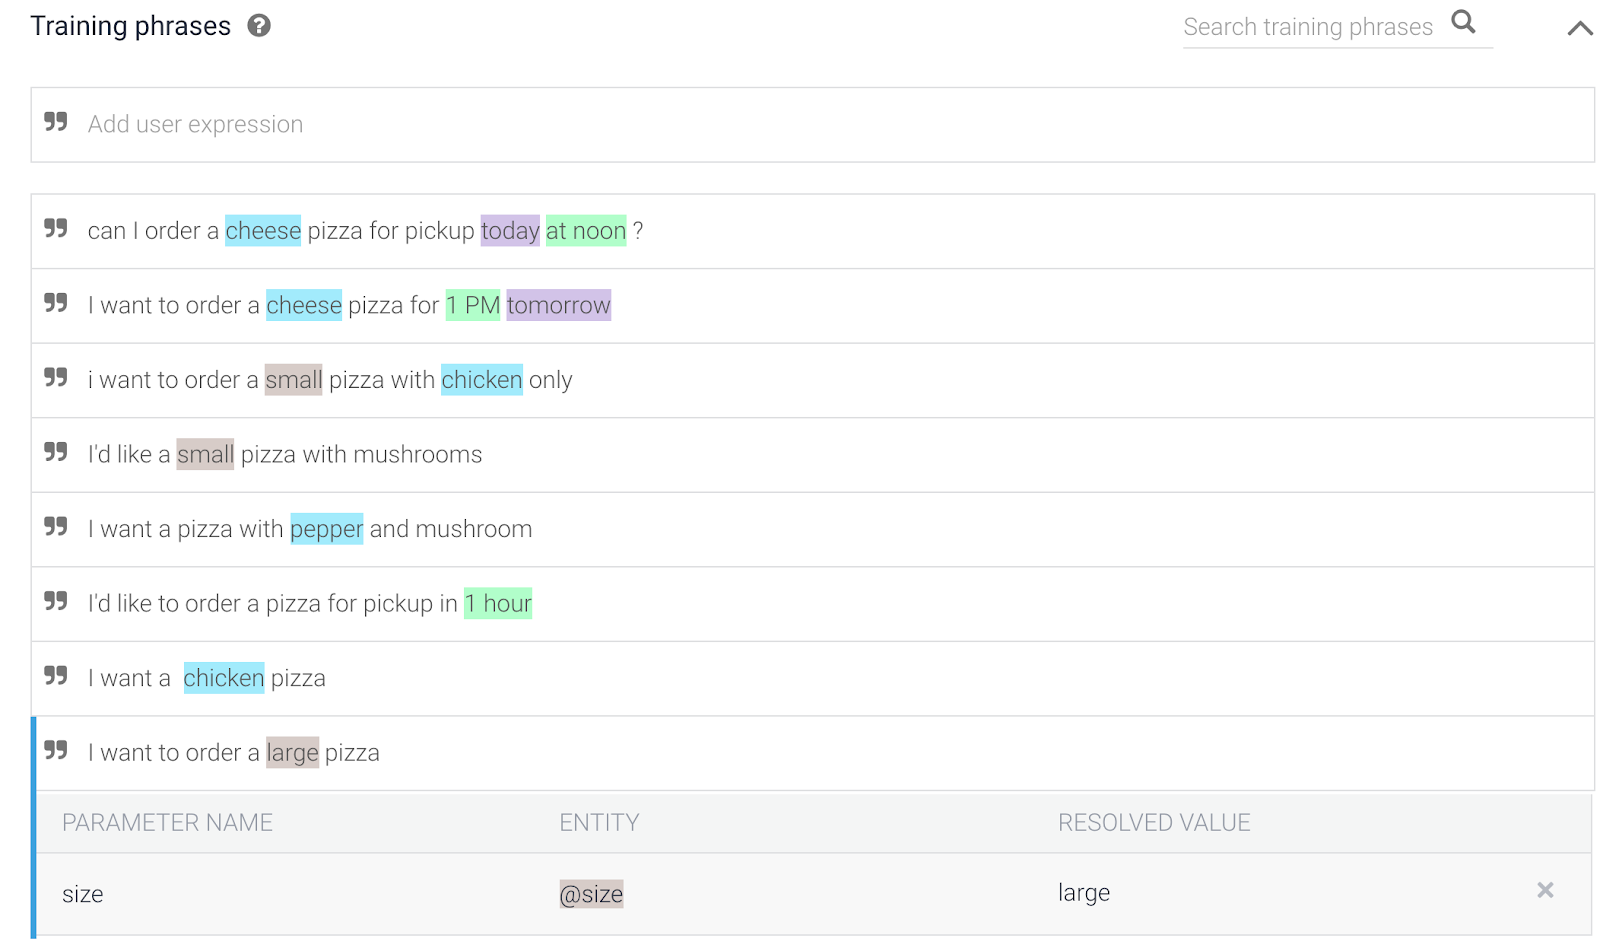
- Once you have done this for all training phrases, you can see all parameters and their entities in the Actions and parameters box:
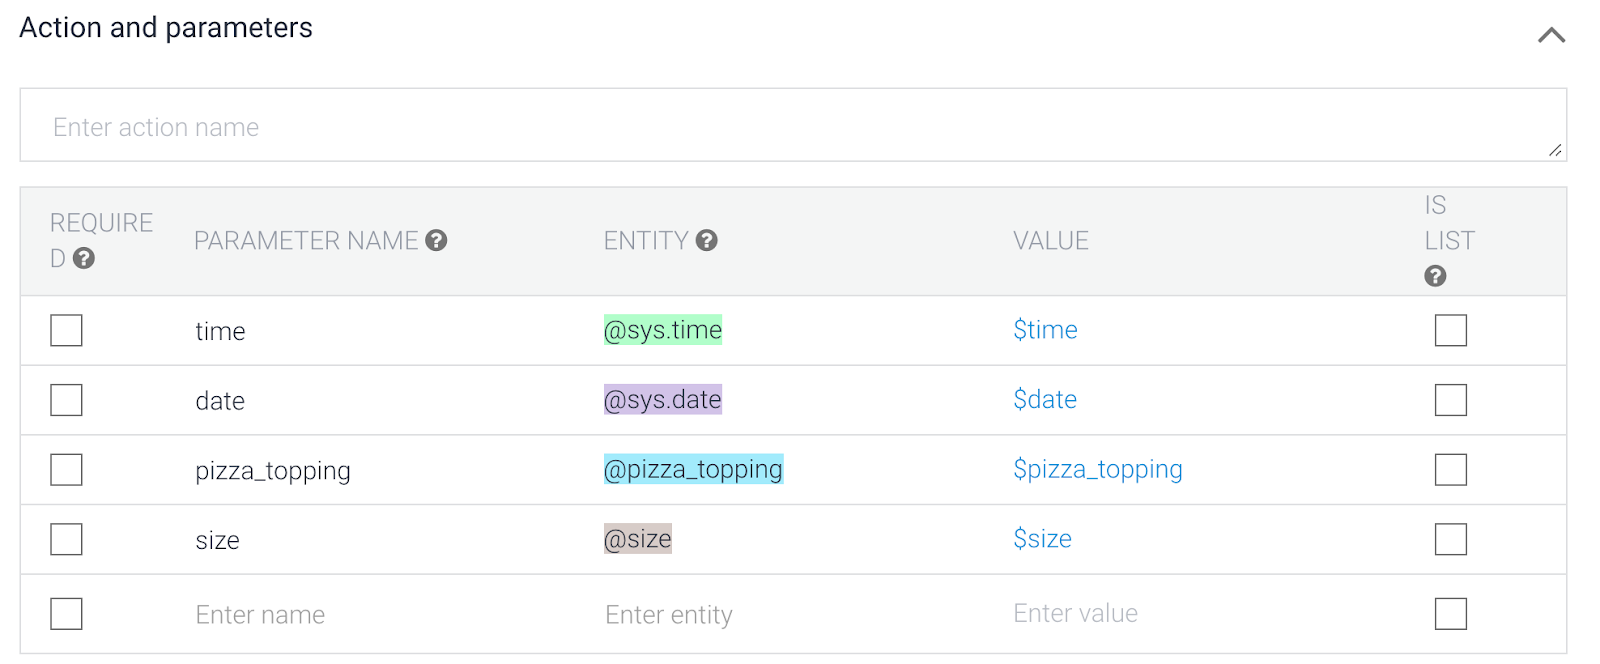
- You can now modify the Responses section to now include the additional new parameters in your default text response to say: We have placed your order for a $size pizza with $pizza_topping, for pickup on $date at $time. See you then!
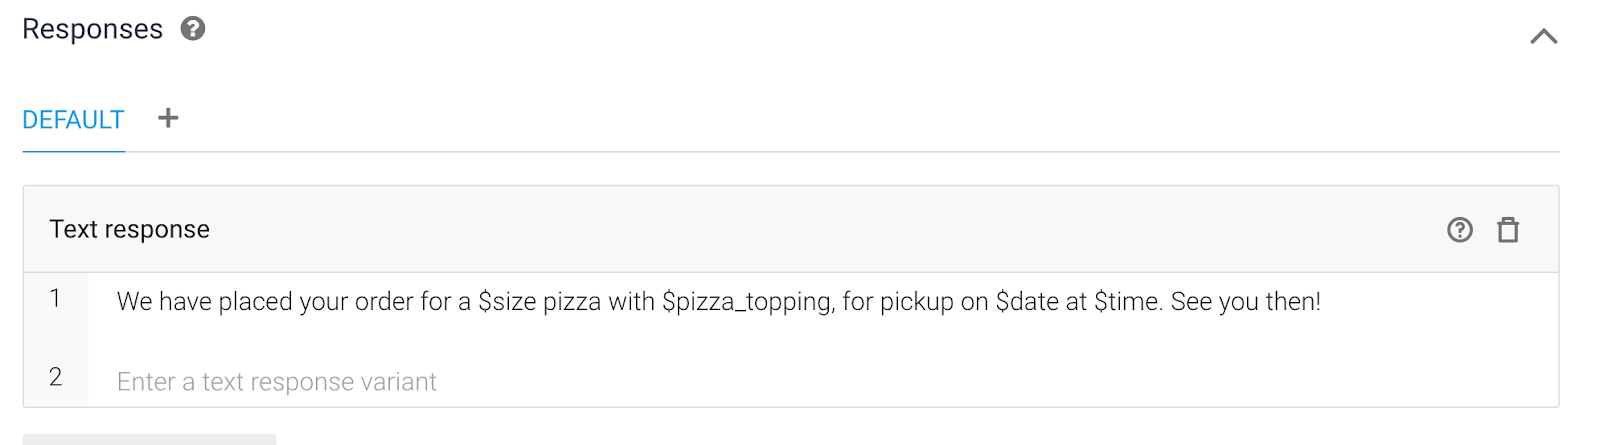
- Click the Save button.
Task 8: Use slot-filling
Although you have updated the response to include all 4 types of parameters, how can you ensure that get all that info from the user? The answer is slot-filling. The agent needs to make sure that if the user does not provide this info, it will need to prompt the user to provide it.
-
In the Actions and parameters box, check the checkbox to the left of each parameter to make it a required parameter.

-
As you check the checkboxes, you will see a new column added for each parameter, called Prompts. These are the prompts (or questions) presented to your user to get the desired parameter value filled. For example, if the user says ‘I want a large chicken pizza” , the prompt for size parameter could ask: “What size pizza do you want ? “
-
For each parameter, click the “Define Prompt” link and add the questions in the popup box that appears as follows:
| time | What time do you want to pick up the order? |
| date | What day do you want to pick up your order ? |
| pizza_topping | What toppings do you want on your pizza ? |
| size | What size pizza do you want ? |
-
Once you have added the prompts for all 4 parameters, click the Save button on the top. Wait for the Agent Training started and Agent Training completed messages on the bottom right of the screen.
-
Try it out in the simulator by typing out the question: Can I have a large pizza please. You will notice the agent replying with one of the prompts you just defined, since that info is not in your original question.
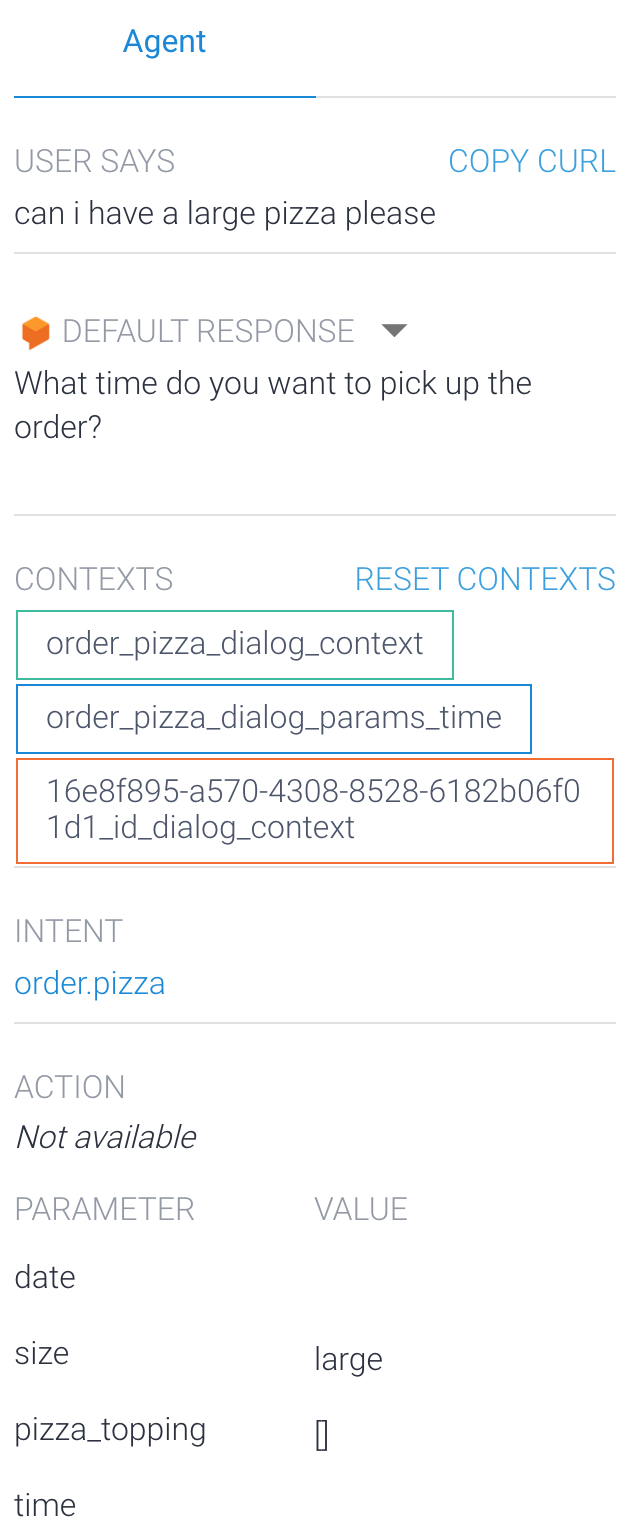
-
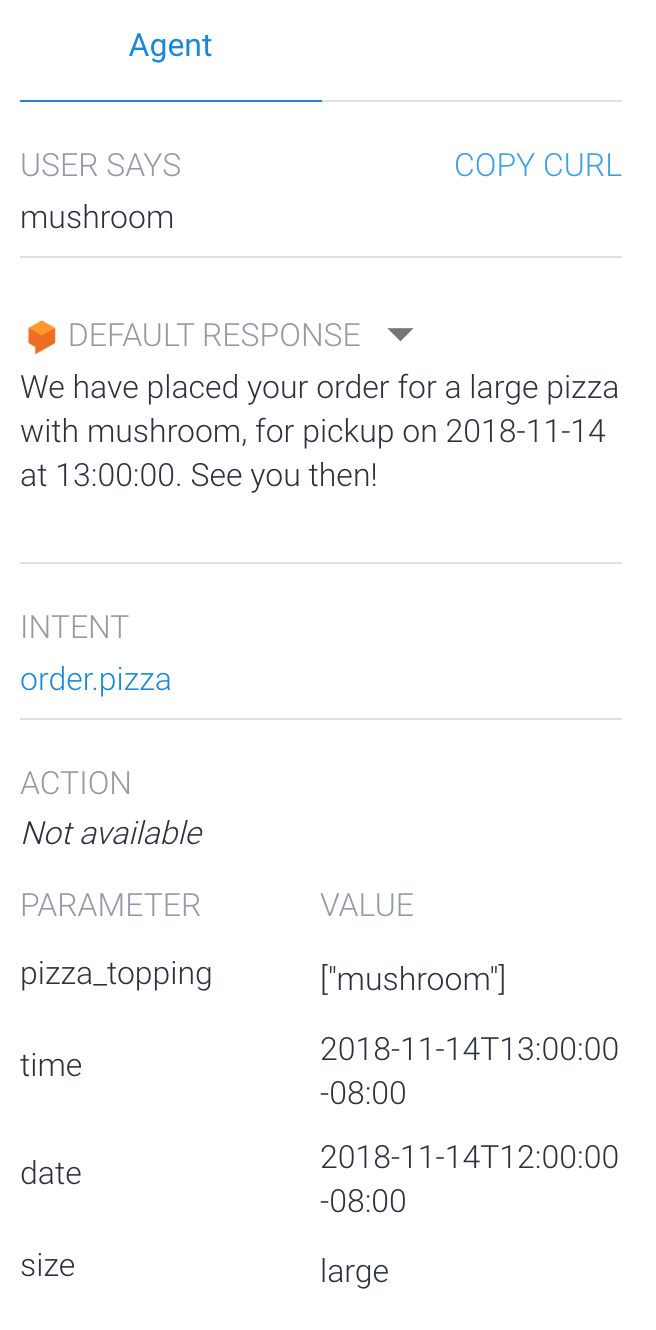
And as you answer, it prompts you for other parameters until it is ready to place your order and displays the final response as shown below (notice the ACTION section in the screenshot below shows all the parameters and their values extracted from the conversation):
And that’s it , now you can a play a little more with your chatbot and try to add more intent and entities ( for delivery , drink .. )