Facial mapping and landmarks detection
In this article , we are going to talk about landmarks detection in images :
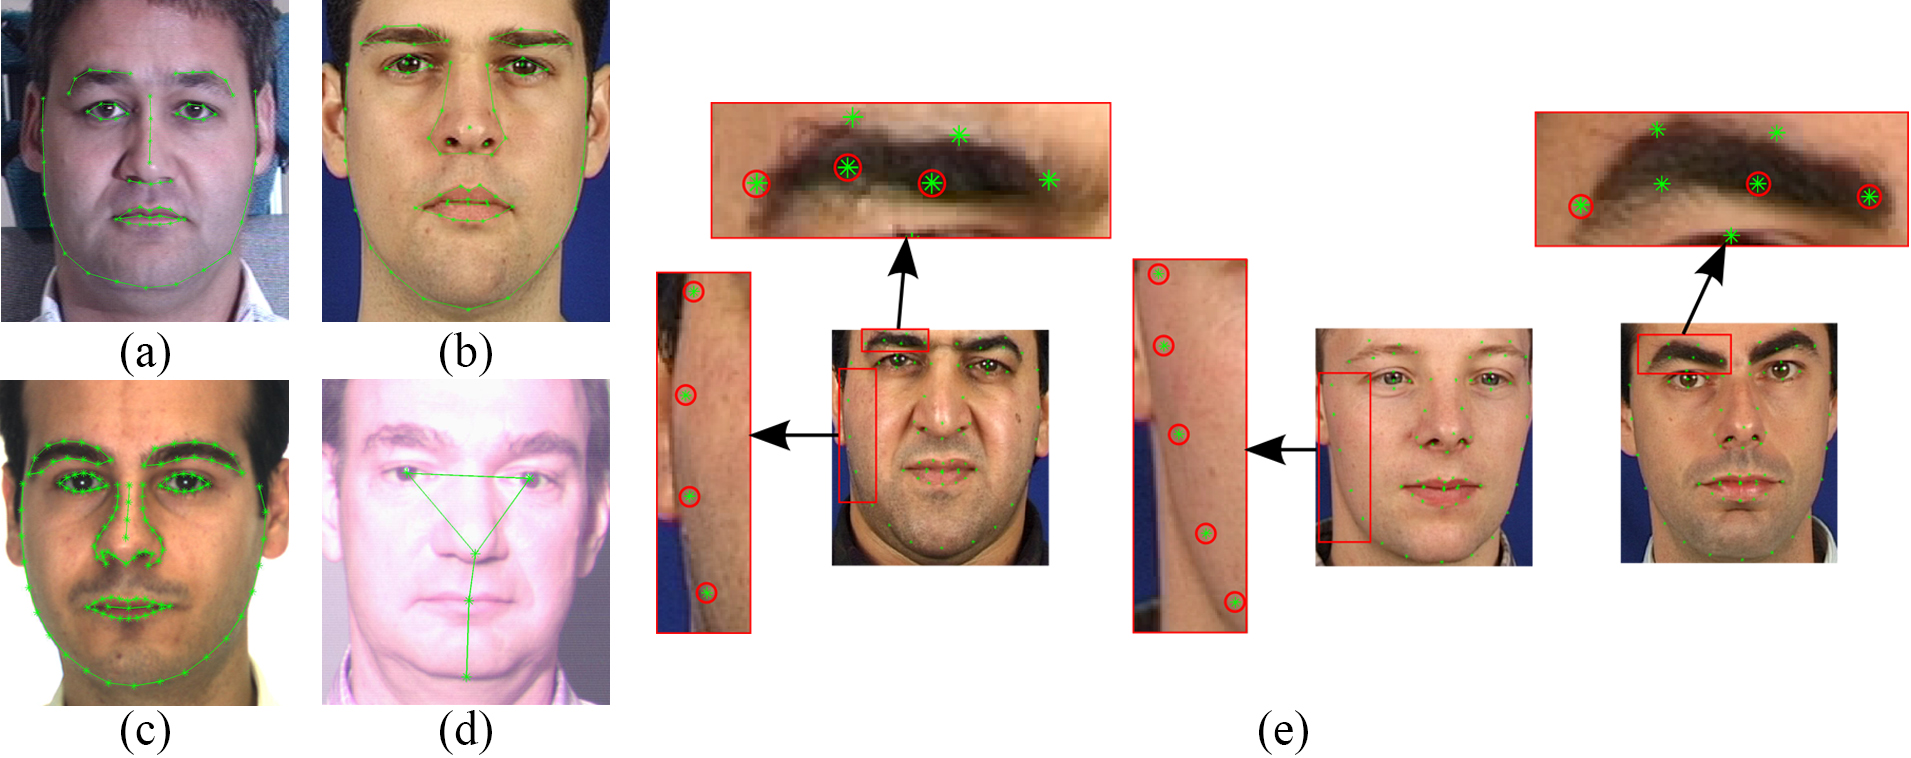
Identifying faces in photos or videos is very cool, but this isn’t enough information to create powerful applications, we need more information about the person’s face, like position, whether the mouth is opened or closed, whether the eyes are opened, closed, looking up and etc. In this article I will present to you , in a quick and objective way, the Dlib, a library capable of giving you 68 points (landkmarks) of the face.
What is Dlib?
It‘s a landmark’s facial detector with pre-trained models, the dlib is used to estimate the location of 68 coordinates (x, y) that map the facial points on a person’s face like image below.
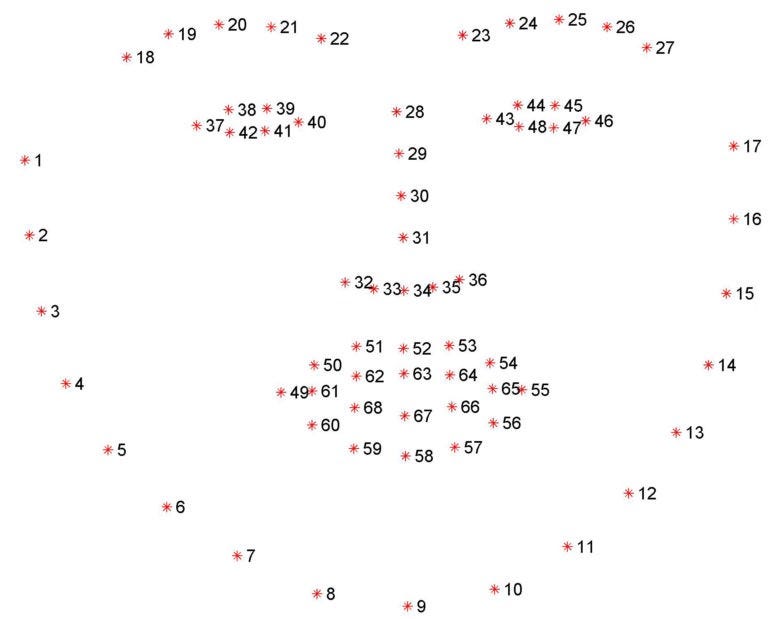
These points are identified from the pre-trained model where the iBUG300-Wdataset was used .
Show me the code!
In this “Hello World” we will use:
- numpy
- opencv
- imutils
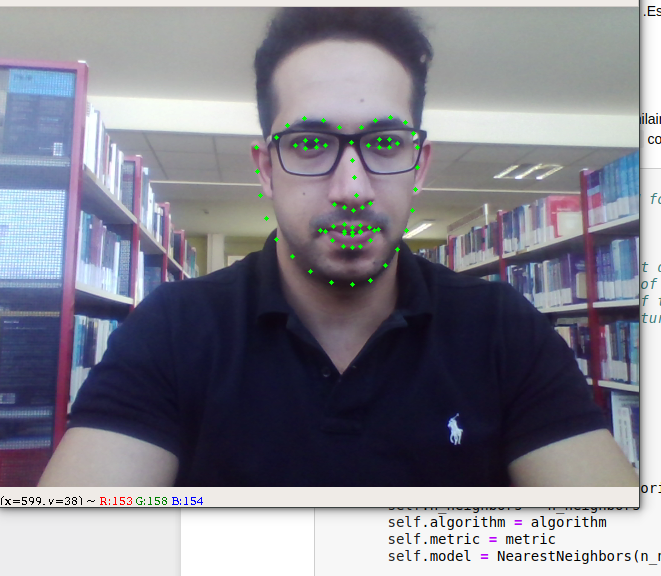
In this tutorial I will code a simple example with that is possible with dlib. we are indentify and plot the face’s points on the image, in future articles I will detail a little more the use of this beautiful library.
Installing the dependencies.
pip install numpy opencv-python dlib imutils
Starting by the image capture that we are going to work on, we will use OpenCV to capture the image’s webcam in an “infinite” loop and thus give the impression of watching a video.
import cv2

# if (you have only 1 webcam){ set device = 0} else{ chose your favorite webcam setting device = 1, 2 ,3 ... }

cap = cv2.VideoCapture(0)

while True:

	# Getting our image by webcam and converting it into a gray image scale

	_, image = cap.read()

	gray = cv2.cvtColor(image, cv2.COLOR_BGR2GRAY)

	# show the gray image

	cv2.imshow("Output", image)

	#key to give up the app.

	k = cv2.waitKey(5) & 0xFF

	if k == 27:

		break

cv2.destroyAllWindows()

cap.release()
Run your script and make sure your webcam’s image is being captured (it will open a window for you with the webcam’s image).
After getting our picture, let’s do the magic happen.
REMINDER: We are using the model already trained, we will need to download the file shape_predictor_68_face_landmarks.dat that you can find it quickly in the net .
from imutils import face_utils

import dlib

import cv2

# Vamos inicializar um detector de faces (HOG) para então

# let's go code an faces detector(HOG) and after detect the

# landmarks on this detected face

# p = our pre-treined model directory, on my case, it's on the same script's diretory.

p = "shape_predictor_68_face_landmarks.dat"

detector = dlib.get_frontal_face_detector()

predictor = dlib.shape_predictor(p)

cap = cv2.VideoCapture(0)

while True:

	# Getting out image by webcam

	_, image = cap.read()

	# Converting the image to gray scale

	gray = cv2.cvtColor(image, cv2.COLOR_BGR2GRAY)

	# Get faces into webcam's image

	rects = detector(gray, 0)

	# For each detected face, find the landmark.

	for (i, rect) in enumerate(rects):

	# Make the prediction and transfom it to numpy array

		shape = predictor(gray, rect)

		shape = face_utils.shape_to_np(shape)

		# Draw on our image, all the finded cordinate points (x,y)

		for (x, y) in shape:

			cv2.circle(image, (x, y), 2, (0, 255, 0), -1)

	# Show the image

	cv2.imshow("Output", image)

	k = cv2.waitKey(5) & 0xFF

	if k == 27:

		break

cv2.destroyAllWindows()

cap.release()
After that, just run the script, you have your “hello_world” in Dlib working, in future articles I’ll detail a little more about how to extract more information about the faces founded in the image.
All the code is on my github.